Hey folks I Already posted you a trick to make a icon for shutdown /restart/logoff .
Now i'll present you a tip to make the shutdown faster than ever before.
Follow this steps to make faster
Steps
*goto strat
*click run and type Regedit(Registry editor) click enter
* then select HKEY CURRENT USERoption in the left side column
*after that select control panel -->desktop
*then find the item "AutoEndTasks" in right side column
right click that modify "AutoEndTasks"="1"
*then click and modify "HungAppTimeout"="1000"
*Modify "WaitToKillAppTimeout"="2000"
*after that goto HKEY_LOCAL_MACHINE-->SYSTEM-->CurrentControlSet-->Control
modify
"WaitToKillServiceTimeout"="2000"
*close the regedit and restart
or you can follow this simple method
*Open Notepad, copy and paste the following to the Notepad
Windows Registry Editor Version 5.00
[HKEY_CURRENT_USER\Control Panel\Desktop]
"AutoEndTasks"="1"
"HungAppTimeout"="1000"
"WaitToKillAppTimeout"="2000"
[HKEY_LOCAL_MACHINE\SYSTEM\CurrentControlSet\Control]
"WaitToKillServiceTimeout"="2000"
*Save the file with extension .reg (registry file)
*Double click open this file and click Yes and the OK
*restart
Download Windows Registry editor 5.0
By following anyone of the above tips windows shuts down faster than never before
hope you like this tweak.
Showing posts with label computer tips and tricks. Show all posts
Showing posts with label computer tips and tricks. Show all posts
Sunday, August 1, 2010

How to Restart Windows without Restarting your PC
Restart your computer without rebooting.
There are two types of reboots hot reboot and cold reboot.
The main difference between the two types of start up is that, on a hot boot, the CPU remains powered up. On a cold start the CPU powers down then restarts.
This helps you when u installed a program which requests the restart while you are working on some important work.
when you click on the shutdown button, make sure to simultaneous press shift Button.
If you hold the Shift key down while clicking on Shutdown button, you computer will restart without restarting the Computer. This is callled a hot reboot.
There are two types of reboots hot reboot and cold reboot.
The main difference between the two types of start up is that, on a hot boot, the CPU remains powered up. On a cold start the CPU powers down then restarts.
This helps you when u installed a program which requests the restart while you are working on some important work.
when you click on the shutdown button, make sure to simultaneous press shift Button.
If you hold the Shift key down while clicking on Shutdown button, you computer will restart without restarting the Computer. This is callled a hot reboot.
Rename your Recyclebin
Change the name of your Recycle Bin,the place where temporarely deleted files are stored.
Just follow the following simple steps and have fun.
*Goto 'start' menu ,Choose 'Run' command.
*Type 'regedit' (without quotes).
* then you may notice Registery editor window.
*Select "HKEY_CLASSES_ROOT" and then CLSD
*Then select "{645FF040-5081-101B-9F08-00AA002F954E}"(you may notice lot of folders,dont worry)
*Open the shellFolder folder
*Change the "Attributes" data value from "40 01 00 20" to "50 01 00 20".
*change the "CallForAttributes" dword value to "0x00000000"
Change the value from 40 to 0.
*You must change both of these values to get the rename to appear.
*After performing the above steps you will be able to rename the icon like any other icon. Right-click the Recycle Bin icon on the desktop and click rename and rename it to any of your choice.
*NOTE: this above works only for windows xp
****************************************************************************************
The below procedure is for all windows apart from xp
*Double click on Default icon from the right side of your window
*you will see the current name of your "recycle bin".
Simple change it to whatever you want ex: Trash or your name
*close the Registry Editor.
*CLick O.K. button.
*Goto Your Desktop and Refresh the Desktop and See the magic.
Your Recycle Bin has been Renamed.
*hope you like this trick
NOTE: this works only for windows xp
Just follow the following simple steps and have fun.
*Goto 'start' menu ,Choose 'Run' command.
*Type 'regedit' (without quotes).
* then you may notice Registery editor window.
*Select "HKEY_CLASSES_ROOT" and then CLSD
*Then select "{645FF040-5081-101B-9F08-00AA002F954E}"(you may notice lot of folders,dont worry)
*Change the "Attributes" data value from "40 01 00 20" to "50 01 00 20".
*change the "CallForAttributes" dword value to "0x00000000"
Change the value from 40 to 0.
*You must change both of these values to get the rename to appear.
*After performing the above steps you will be able to rename the icon like any other icon. Right-click the Recycle Bin icon on the desktop and click rename and rename it to any of your choice.
*NOTE: this above works only for windows xp
****************************************************************************************
The below procedure is for all windows apart from xp
*Goto 'start' menu ,Choose 'Run' command.
*Type 'regedit' (without quotes).
* then you may notice Registery editor window.
*Select "HKEY_CLASSES_ROOT" and then CLSD
*Then select "{645FF040-5081-101B-9F08-00AA002F954E}"
*Double click on Default icon from the right side of your window
*you will see the current name of your "recycle bin".
Simple change it to whatever you want ex: Trash or your name
*close the Registry Editor.
*CLick O.K. button.
*Goto Your Desktop and Refresh the Desktop and See the magic.
Your Recycle Bin has been Renamed.
*hope you like this trick
NOTE: this works only for windows xp
Saturday, July 31, 2010
How to Defragment Your Hard Disk Drive
 Image via Wikipedia
This tool optimises the fragmented parts on hard disk .
Before getting into how to Defragment lets just now about Fragmentation
What is fragmentation?
Fragmentaton is a phenomenon in which storage space is used inefficiently, reducing storage capacity and in most cases performance.
Fragmentation occurs naturally when you use the hard disk drive usually through doing basic tasks like deleting, modifying, and creating files abruptly.
Defragmentation is a process that reduces the amount of Fragmentation in hard disk and eventually saving the space in hard disk.
How to Defragment
Before starting disk fragmenter close all programs ,Remove temporary internet files for better results
Steps:
*Click Start
*Select All Programs
*Click on Accessories
*Click on System Tools
* Run Disk Defragmenter
*select the drive which you want to defragment and start analyse
*Then start Defragmentation

Defragmenting may take a while juts be patient till it comes
After the completion of process you will notice that some memory is been saved.

Increase Hard Disk R/w speed in Windows
Increase or optimize your Hard Disk read/write speed without any Extra software or changing HardDisk , increasing RAM just following steps .After doing so you can witness the improvement in speed as never before.
Steps to increase Harddisk R/W speed
*go to start and select Run command
*run SYSEDIT.EXE program from run
 * you may notice a bunch of windows ,in that select SYSTEM.INI and expand it
*scroll down to find the line "386enh" in the file.
*Press Enter to make one get next line, and in that line type
Irq14=4096 Press Enter to make one blank line, and in that line type
* Click on the File menu, then choose option Save.
* reboot your computer.
After Restarting windows you may notice improve in hard disk R/W speed as never before..
**note: Irq14 is case sensitive ...
:this trick works better with IDE drives.
Steps to increase Harddisk R/W speed
*go to start and select Run command
*run SYSEDIT.EXE program from run

*scroll down to find the line "386enh" in the file.
*Press Enter to make one get next line, and in that line type
Irq14=4096 Press Enter to make one blank line, and in that line type
* Click on the File menu, then choose option Save.
* reboot your computer.
After Restarting windows you may notice improve in hard disk R/W speed as never before..
**note: Irq14 is case sensitive ...
:this trick works better with IDE drives.
Friday, July 30, 2010
Create a Shutdown/Reboot/LogOff Icon
Create your own icon for shutting ,restarting windows.

Windows xp has a program called shutdown.exe which allows to create a icon for shutdown.
To create an icon just follow the following steps:
1)Right click on an open area of the desktop
2)Select New -> Shortcut
For shutdown:
* Enter in shutdown -s -t 00
For Restart
*Enter shutdown -r -t 00
For Logging off
*Enter shutdown -l -t 00
Here 00 indicates the time in sec. e.g. 10- will shutdown PC after 10 sec
3)Press the Next button
4) name the shortcut as u wish .
5) Click on the Finish button.

Windows xp has a program called shutdown.exe which allows to create a icon for shutdown.
To create an icon just follow the following steps:
1)Right click on an open area of the desktop
2)Select New -> Shortcut
For shutdown:
* Enter in shutdown -s -t 00
For Restart
*Enter shutdown -r -t 00
For Logging off
*Enter shutdown -l -t 00
Here 00 indicates the time in sec. e.g. 10- will shutdown PC after 10 sec
3)Press the Next button
4) name the shortcut as u wish .
5) Click on the Finish button.
Here -s shutdowns the computer
-r restarts
-l log offs
-a it aborts the shutdown
-f forces to close all applications
-t xx sets the timer to shutdown in certain no of seconds...xx =seconds ,say 20

-r restarts
-l log offs
-a it aborts the shutdown
-f forces to close all applications
-t xx sets the timer to shutdown in certain no of seconds...xx =seconds ,say 20
Thursday, July 29, 2010
Firefox Keyboard Shortcuts
Here are the some of the Firefox keyboard shortcuts that will help you in web browsing .
These shorcuts are simple but they are incredibley easier.
*open new tabs with CTRl + T
*Switch tabs using CTRL + n
Here n is not a letter .In this it represents the number key from 1 to 9 .Hold control and 'n' to switch between tabs.
*go to the address bar with CTRL + L
*Use CTRL + K to get the Search bar
*Use CTRL + Tab to switch,toggle between the tabs.
*Use backspace to get back to previous page
* to search certain word in web page use CTRL + F
*To close current Tab CTRL + W or CTRL + F4
* To close windows alt + F4
*to open new windows CTRL + N
* To get to address bar in new tab ALT + ENTER
*to open bookmarks CTRL + b
* to add bookmark CTRL + d
*to get to downloads ctrl + j
*To toggle private browsing ctrl + shift + p
* to clear browsing history ctrl + shift + del
These shorcuts are simple but they are incredibley easier.
*open new tabs with CTRl + T
*Switch tabs using CTRL + n
Here n is not a letter .In this it represents the number key from 1 to 9 .Hold control and 'n' to switch between tabs.
*go to the address bar with CTRL + L
*Use CTRL + K to get the Search bar
*Use CTRL + Tab to switch,toggle between the tabs.

*Use backspace to get back to previous page

* to search certain word in web page use CTRL + F
*To close current Tab CTRL + W or CTRL + F4
* To close windows alt + F4
*to open new windows CTRL + N
* To get to address bar in new tab ALT + ENTER
*to open bookmarks CTRL + b
* to add bookmark CTRL + d
*to get to downloads ctrl + j
*To toggle private browsing ctrl + shift + p
* to clear browsing history ctrl + shift + del
Windows 7 shortcuts
I already presented you some of windows xp shorcuts under keyboard shorcuts.
Here are the some of Keyboard shortcuts for Windows 7
Win + Tab : to cycle between Windows
Win + E : Windows Explorer is launched.
Win + R : Run Command is launched.
Win + F : Search (which is there in previous Windows versions too)
Win+ X : Mobility Center
Win+ L : Lock Computer
Win + U : Launches Ease of Access
Win + P : Projector
Win + T : Cycle Super Taskbar Items
Win + S : OneNote Screen Clipping Tool [you need to install one note first to get this (ms office)]
Win + M : Minimize All Windows
Win + D : Show/Hide Desktop
Win + Up : Maximize Current Window
Win + Down : Restore Down / Minimize Current Windows
Win+ Left : Tile Current Window to the Left
Win + Right : Tile Current Windows to the Right
Win+ any number : Quickly Launch a new instance of the application in the Nth slot on the taskbar.
Example Win+1 launches first pinned app,Win+2 launches second, etc.
Win+ = : Launches the Magnifier
Win + Plus : to Zoom in
Win + Minus : Zooms out
Win + Space : to Peek at the desktop
Here are the some of Keyboard shortcuts for Windows 7
Win + Tab : to cycle between Windows
Win + E : Windows Explorer is launched.
Win + R : Run Command is launched.
Win + F : Search (which is there in previous Windows versions too)
Win+ X : Mobility Center
Win+ L : Lock Computer
Win + U : Launches Ease of Access
Win + P : Projector
Win + T : Cycle Super Taskbar Items
Win + S : OneNote Screen Clipping Tool [you need to install one note first to get this (ms office)]
Win + M : Minimize All Windows
Win + D : Show/Hide Desktop
Win + Up : Maximize Current Window
Win + Down : Restore Down / Minimize Current Windows
Win+ Left : Tile Current Window to the Left
Win + Right : Tile Current Windows to the Right
Win+ any number : Quickly Launch a new instance of the application in the Nth slot on the taskbar.
Example Win+1 launches first pinned app,Win+2 launches second, etc.
Win+ = : Launches the Magnifier
Win + Plus : to Zoom in
Win + Minus : Zooms out
Win + Space : to Peek at the desktop
Shorcut to open Various Windows utilities through Run
Run shortcuts for all windows operating systems windows xp/vista /windows 7
We can open any windows utility or a program through run
Here are the some of the commands for opening windows applications .
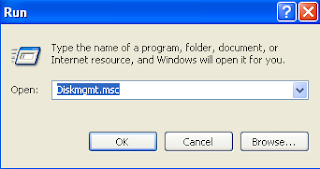
Go to start and click run and type below commands
Calc - Calculator
certmgr.msc - Certificate Manager
Cfgwiz32 - ISDN Configuration Wizard
Charmap - Character Map
Chkdisk - Repair damaged files
ciadv.msc - Indexing Service
Cleanmgr - Cleans up hard drives
Clipbrd - Windows Clipboard viewer
Cmd - Opens a new Command Window
compmgmt.msc - Computer management
Control - Displays Control Panel
Dcomcnfg - DCOM user security
Debug - Assembly language programming tool
Defrag - Defragmentation tool
devmgmt.msc - Device Manager
dfrg.msc - Defragment
diskmgmt.msc - Disk Management
Drwatson - Records programs crash & snapshots
Dxdiag - DirectX Diagnostic Utility
Explorer - Windows Explorer
Eventvwr.msc - Event Viewer
Fontview - Graphical font viewer
Ftp - ftp.exe program
Fsmgmt.msc - Folder Sharing Management
gpedit.msc - Group Policy (works for XP Pro only)
Hostname - Returns Computer's name
Ipconfig - Displays IP configuration for all network adapters
Iis.msc - Internet Information Services
Jview - Microsoft Command-line Loader for Java classes
lusrmgr.msc - Local Users and Groups
MMC - Microsoft Management Console
Msconfig - Configuration to edit startup files
mscorcfg.msc - Net configurations
Msinfo32 - Microsoft System Information Utility
Nbtstat - Displays stats and current connections using NetBios over TCP/IP
Netstat - Displays all active network connections
Nslookup - Returns your local DNS server
Ntmsmgr.msc - Removable Storage
Odbcad32 - ODBC Data Source Administrator
Perfmon.msc - Performance Manager
Ping - Sends data to a specified host/IP
Regedit - registry Editor
Regsvr32 - register/de-register DLL/OCX/ActiveX
Regwiz - Reistration wizard
Secpol.msc - Local Security Policy
services.msc - System Services
Sfc /scannow - Sytem File Checker
Sndrec32 - Sound Recorder
Sndvol32 - Volume control for soundcard
Sysedit - Edit system startup files
Systeminfo - display various system information in text console
Taskmgr - Task manager
Telnet - Telnet program
Taskkill - kill processes using command line interface
Tskill - short version for Windows XP Home
Tracert - Traces and displays all paths required to reach an internet host
Winchat - simple chat program for Windows networks
Winipcfg - Displays IP configuration(only for win 98)
Wmimgmt.msc - Windows Management
All above command are not case sensitive.
We can open any windows utility or a program through run
Here are the some of the commands for opening windows applications .

Go to start and click run and type below commands
Calc - Calculator
certmgr.msc - Certificate Manager
Cfgwiz32 - ISDN Configuration Wizard
Charmap - Character Map
Chkdisk - Repair damaged files
ciadv.msc - Indexing Service
Cleanmgr - Cleans up hard drives
Clipbrd - Windows Clipboard viewer
Cmd - Opens a new Command Window
compmgmt.msc - Computer management
Control - Displays Control Panel
Dcomcnfg - DCOM user security
Debug - Assembly language programming tool
Defrag - Defragmentation tool
devmgmt.msc - Device Manager
dfrg.msc - Defragment
diskmgmt.msc - Disk Management
Drwatson - Records programs crash & snapshots
Dxdiag - DirectX Diagnostic Utility
Explorer - Windows Explorer
Eventvwr.msc - Event Viewer
Fontview - Graphical font viewer
Ftp - ftp.exe program
Fsmgmt.msc - Folder Sharing Management
gpedit.msc - Group Policy (works for XP Pro only)
Hostname - Returns Computer's name
Ipconfig - Displays IP configuration for all network adapters
Iis.msc - Internet Information Services
Jview - Microsoft Command-line Loader for Java classes
lusrmgr.msc - Local Users and Groups
MMC - Microsoft Management Console
Msconfig - Configuration to edit startup files
mscorcfg.msc - Net configurations
Msinfo32 - Microsoft System Information Utility
Nbtstat - Displays stats and current connections using NetBios over TCP/IP
Netstat - Displays all active network connections
Nslookup - Returns your local DNS server
Ntmsmgr.msc - Removable Storage
Odbcad32 - ODBC Data Source Administrator
Perfmon.msc - Performance Manager
Ping - Sends data to a specified host/IP
Regedit - registry Editor
Regsvr32 - register/de-register DLL/OCX/ActiveX
Regwiz - Reistration wizard
Secpol.msc - Local Security Policy
services.msc - System Services
Sfc /scannow - Sytem File Checker
Sndrec32 - Sound Recorder
Sndvol32 - Volume control for soundcard
Sysedit - Edit system startup files
Systeminfo - display various system information in text console
Taskmgr - Task manager
Telnet - Telnet program
Taskkill - kill processes using command line interface
Tskill - short version for Windows XP Home
Tracert - Traces and displays all paths required to reach an internet host
Winchat - simple chat program for Windows networks
Winipcfg - Displays IP configuration(only for win 98)
Wmimgmt.msc - Windows Management
All above command are not case sensitive.
Wednesday, July 28, 2010
Free six months subscription of Mcafee internet security
Do you have a Facebook account or else register yourself and Get yourself gifted with six months of subscription of McAfee Internet Security!!
If you have a Facrebook account you can can get 6 months free subscription of Internet Security software from McAfee. As per the deal between social Networking Gaint Facebook and McAfee.You can alos renew the copy of Mcafee after six months with a Discounted price.

Follow these Steps to get your Copy:
*Go to facebook.com and login.
*open the McAfee Fan Page ....Here.
*clck like on fan page to become fan.
*Next select your country after that you will be redirected to McAfee download page
*click get started now.
*Enter you name, email address and password for creating a personal page on McAfee.
*enter the billing information about debit card if you want a copy after six months.
*After then you will be redirected to download page where donwload starts
 |
If you have a Facrebook account you can can get 6 months free subscription of Internet Security software from McAfee. As per the deal between social Networking Gaint Facebook and McAfee.You can alos renew the copy of Mcafee after six months with a Discounted price.

Follow these Steps to get your Copy:
*Go to facebook.com and login.
*open the McAfee Fan Page ....Here.
*clck like on fan page to become fan.
*Next select your country after that you will be redirected to McAfee download page
*click get started now.
*Enter you name, email address and password for creating a personal page on McAfee.
*enter the billing information about debit card if you want a copy after six months.
*After then you will be redirected to download page where donwload starts
Tuesday, July 27, 2010
Taking Screenshots in Windows
An easy way to take screen shots of in windows is by locating the "print screen " button on your keyboard and press it.
once you press the image of what ever on screen is copied to a clip board.now go to the microsoft tools and select clip organiser,edit and save it.
Alternatively, you can paste the screenshot into a Word pad or paint
 you can also restrict the print screen function to only capturing an image of the current active window by holding the Alt key while you press Print Screen.
a short cut for screen cliping is win + s directly you can goto clip ,edit and then save it.
On Mac osX
To take a screen shot on mac just hold Cmd + Shift + 4, press the spacebar, then click on the window whose screenshot you want to capture. The image will save to your desktop as a PDF file.
once you press the image of what ever on screen is copied to a clip board.now go to the microsoft tools and select clip organiser,edit and save it.
Alternatively, you can paste the screenshot into a Word pad or paint

a short cut for screen cliping is win + s directly you can goto clip ,edit and then save it.
On Mac osX
To take a screen shot on mac just hold Cmd + Shift + 4, press the spacebar, then click on the window whose screenshot you want to capture. The image will save to your desktop as a PDF file.
Chat with Command Prompt on Network
Chat with your friends or client on a network without any messenger software.All you goto need is the Ip address of your Friend and Commnad shell,command prompt.
1)go to notepad
paste the below code
___________________________________________________________________________________
@echo off
:A
Cls
echo MESSENGER
set /p n=User:
set /p m=Message:
net send %n% %m%
Pause
Goto A
_____________________________________________________________________________
2)save this a Messenger.bat
3)open it then you would get a window of command prompt like this
 At user type the ip address of your client or friend
Message: as you wish
after this hit enter.
for ex:
 Hope you like it.
1)go to notepad
paste the below code
___________________________________________________________________________________
@echo off
:A
Cls
echo MESSENGER
set /p n=User:
set /p m=Message:
net send %n% %m%
Pause
Goto A
_____________________________________________________________________________
2)save this a Messenger.bat
3)open it then you would get a window of command prompt like this

Message: as you wish
after this hit enter.
for ex:

Monday, July 26, 2010
Lock a Folder Without using a software
Most of us often thought about hiding a personal files and personal information,crucial data from others.I already presented you the idea of hiding,encrypting files in a pic now i'll let u know how to lock a folder without any software.
So lets start the Trick
1)copy the below code to a notepad
__________________________________________________________________________________
cls
@ECHO OFF
title Folder Locker
if EXIST "Control Panel.{21EC2020-3AEA-1069-A2DD-08002B30309D}" goto UNLOCK
if NOT EXIST Locker goto MDLOCKER
:CONFIRM
echo
echo ......................................................
echo Are you sure you want to Lock the folder(Y/N)
set/p "cho=>"
if %cho%==Y goto LOCK
if %cho%==y goto LOCK
if %cho%==n goto END
if %cho%==N goto END
echo Invalid choice.
goto CONFIRM
:LOCK
ren Locker "Control Panel.{21EC2020-3AEA-1069-A2DD-08002B30309D}"
attrib +h +s "Control Panel.{21EC2020-3AEA-1069-A2DD-08002B30309D}"
echo Folder locked
goto End
:UNLOCK
echo
echo ......................................................
echo Enter password to Unlock folder
set/p "pass=>"
if NOT %pass%== type your password here goto FAIL
attrib -h -s "Control Panel.{21EC2020-3AEA-1069-A2DD-08002B30309D}"
ren "Control Panel.{21EC2020-3AEA-1069-A2DD-08002B30309D}" Locker
echo Folder Unlocked successfully....
goto End
:FAIL
echo Invalid password
goto end
:MDLOCKER
md Locker
echo Locker created successfully
goto End
:End
echo Invalid password
goto end
:MDLOCKER
md Locker
echo Locker created successfully
goto End
:End
___________________________________________________________________________________
2) set the desired password by placing it in the position of "type password here in code"..(You will find “type your password here” in that code replace with the desired password )
3)save it as Locker.bat
4) now when you double click the Locker.bat a folder called locker is created automatically there itself..
Place the desired files which you want to hide in that folder .

5)next run Locker.bat again this asks to lock the folder click yes (y)

6)your folder then disappears gets inside the locker ...when ever u want to recover files just double click Locker.bat
it asks for a password ,enter that and access ur data ..

hope u like it..
comment me if u are impressed .
So lets start the Trick
1)copy the below code to a notepad
__________________________________________________________________________________
cls
@ECHO OFF
title Folder Locker
if EXIST "Control Panel.{21EC2020-3AEA-1069-A2DD-08002B30309D}" goto UNLOCK
if NOT EXIST Locker goto MDLOCKER
:CONFIRM
echo
echo ......................................................
echo Are you sure you want to Lock the folder(Y/N)
set/p "cho=>"
if %cho%==Y goto LOCK
if %cho%==y goto LOCK
if %cho%==n goto END
if %cho%==N goto END
echo Invalid choice.
goto CONFIRM
:LOCK
ren Locker "Control Panel.{21EC2020-3AEA-1069-A2DD-08002B30309D}"
attrib +h +s "Control Panel.{21EC2020-3AEA-1069-A2DD-08002B30309D}"
echo Folder locked
goto End
:UNLOCK
echo
echo ......................................................
echo Enter password to Unlock folder
set/p "pass=>"
if NOT %pass%== type your password here goto FAIL
attrib -h -s "Control Panel.{21EC2020-3AEA-1069-A2DD-08002B30309D}"
ren "Control Panel.{21EC2020-3AEA-1069-A2DD-08002B30309D}" Locker
echo Folder Unlocked successfully....
goto End
:FAIL
echo Invalid password
goto end
:MDLOCKER
md Locker
echo Locker created successfully
goto End
:End
echo Invalid password
goto end
:MDLOCKER
md Locker
echo Locker created successfully
goto End
:End
___________________________________________________________________________________
2) set the desired password by placing it in the position of "type password here in code"..(You will find “type your password here” in that code replace with the desired password )
3)save it as Locker.bat
4) now when you double click the Locker.bat a folder called locker is created automatically there itself..
Place the desired files which you want to hide in that folder .

5)next run Locker.bat again this asks to lock the folder click yes (y)

6)your folder then disappears gets inside the locker ...when ever u want to recover files just double click Locker.bat
it asks for a password ,enter that and access ur data ..

hope u like it..
comment me if u are impressed .
Saturday, July 24, 2010
How to stop programs that start up automatically on Windows XP
It often annoys anyone whenver the computer starts with the programs that pops right away .
Before going to work we have to eventually close all these pop ups which annoys us.This continues to go on increasing by installing new software .Everytime when computer starts this problem arises.cant we control this , yes we can.....
*Go to run
*type msconfig and hit enter.

*Then a window opens exactly as this

*then Select option start up
* By unchecking the options on the application on which you dont want on start up

* click ok(Make sure you arent unchecking the system utilities )
*Restart
Before going to work we have to eventually close all these pop ups which annoys us.This continues to go on increasing by installing new software .Everytime when computer starts this problem arises.cant we control this , yes we can.....
*Go to run
*type msconfig and hit enter.

*Then a window opens exactly as this

*then Select option start up
* By unchecking the options on the application on which you dont want on start up

* click ok(Make sure you arent unchecking the system utilities )
*Restart
Thursday, July 8, 2010
speed up pc
Does your pc running like a snail
here are the some of the tips to speed up your pc and make it run faster like a leopard.
1)remove unwanted applications.all annoying unnecessary software which makes pc slower
2)clean up recyclebin .free up the memory using system tool disk fragmenter
go to start -->all programs -->accesories-->systemtools-->disk fragmenter.
 this tool saves a lot of memory.
3)use good updated antivirus
4)keep in update your windows which assures of great performance.
5)keep the desktop clean with minimum no of shortcuts.
6)use a software called ccleaner to clean up the cookies ,internet files etc
 7)fix registry errors
8)there is another interesting tip to make your pc faster ,this just decreases the delay of your pc
start-->run-->regedit-->HKEY_CURRENT_USER -->control panel folder-->desktop folder-->in registry setting options you will find menu show delay right click and select option "modify"
 next you may notice edit string option change the default(400) value to any number between (0 to 400),keep the value as minimun as possible.
restart computer --> then you can see magic,your pc more faster than ever.
although registry editing is not new you can find more info about this in microsoft's support page: http://support.microsoft.com/kb/216445
here are the some of the tips to speed up your pc and make it run faster like a leopard.
1)remove unwanted applications.all annoying unnecessary software which makes pc slower
2)clean up recyclebin .free up the memory using system tool disk fragmenter
go to start -->all programs -->accesories-->systemtools-->disk fragmenter.

3)use good updated antivirus
4)keep in update your windows which assures of great performance.
5)keep the desktop clean with minimum no of shortcuts.
6)use a software called ccleaner to clean up the cookies ,internet files etc

8)there is another interesting tip to make your pc faster ,this just decreases the delay of your pc
start-->run-->regedit-->HKEY_CURRENT_USER -->control panel folder-->desktop folder-->in registry setting options you will find menu show delay right click and select option "modify"

restart computer --> then you can see magic,your pc more faster than ever.
although registry editing is not new you can find more info about this in microsoft's support page: http://support.microsoft.com/kb/216445
Wednesday, July 7, 2010
How to Fix Mss32.dll Errors
Mss32.dll error messages might appear while using or installing certain programs, when Windows starts or shuts down during installation process.
it also occurs due to hardware failure,virus infection or the manual deletion of the Mss32.dll files from the folder.
it may occur due to registry errors
the display message for this would be:
Mss file is missed reinstalling application may fix the problem.
The file mss32.dll is missing.
how to fix this issue:
1)update drivers:
in most of cases this error arises when installing 3D games
download the latest version of directrix ,keep video card drivers up to date
you can download from here:
http://www.softpedia.com/progDownload/DirectX-9.0c-Redistributable-Download-3545.html
2)run virus scan ,check for virus,adware,spyware
3)check for registry problems,fix them
download registry cleaners ex:registry mechanic
http://www.pctools.com/registry-mechanic/
4)resinstall the application: on most of the cases it might fix the issue.
it also occurs due to hardware failure,virus infection or the manual deletion of the Mss32.dll files from the folder.
it may occur due to registry errors
the display message for this would be:
Mss file is missed reinstalling application may fix the problem.
The file mss32.dll is missing.
how to fix this issue:
1)update drivers:
in most of cases this error arises when installing 3D games
download the latest version of directrix ,keep video card drivers up to date
you can download from here:
http://www.softpedia.com/progDownload/DirectX-9.0c-Redistributable-Download-3545.html
2)run virus scan ,check for virus,adware,spyware
3)check for registry problems,fix them
download registry cleaners ex:registry mechanic
http://www.pctools.com/registry-mechanic/
4)resinstall the application: on most of the cases it might fix the issue.
Registry Editing Has Been Disabled By Your Administrator
Registry Editing Has Been Disabled By Your Administrator
step by step procedure for fixing this problem
this problem occurs when computer gets infected with a virus, trojans.
when you type the command Regedit, you get message the Windows Registry
Editor being disabled.

there are so many methods to deal with this problem
if you are using windows xp i suggest to use this
1. Click Start, Run
2. Type GPEDIT.MSC and Press Enter
3. Go to the following location
User Configuration
Administrative Templates
System
4. In the Settings Window, find the option for "Prevent Access to Registry Editing Tools" and double-click on it to change.
5. Select Disabled or Not Configured and choose OK
6. Close the Group Policy Editor and restart your computer
7. Try opening REGEDIT again
you can use symantec's tool to slove this
Use Symantec's tool to reset shell\open\command registry keys
download the UnHookExec.inf file to your desktop. Right-click on it and choose Install. Restart your computer and then try to open the Registry Editor.
step by step procedure for fixing this problem
this problem occurs when computer gets infected with a virus, trojans.
when you type the command Regedit, you get message the Windows Registry
Editor being disabled.

there are so many methods to deal with this problem
if you are using windows xp i suggest to use this
1. Click Start, Run
2. Type GPEDIT.MSC and Press Enter
3. Go to the following location
User Configuration
Administrative Templates
System
4. In the Settings Window, find the option for "Prevent Access to Registry Editing Tools" and double-click on it to change.
5. Select Disabled or Not Configured and choose OK
6. Close the Group Policy Editor and restart your computer
7. Try opening REGEDIT again
you can use symantec's tool to slove this
Use Symantec's tool to reset shell\open\command registry keys
download the UnHookExec.inf file to your desktop. Right-click on it and choose Install. Restart your computer and then try to open the Registry Editor.
Hiding files in a pic
I guess most of us might often thought about hiding files . Here is an interesting way to encrypt files in a pic. Hope you like it. For this you don't need extra software or have to be a computer geek. You just need a simple software winrar which is avialable anywhere .
1)make a folder and place a pic and the file you want to hide.
2)now make the file a new rar file of the same name by right clicking file and then the option add to archive(for this you first need to install winrar).
3)open command .(start->run->cmd)
4)now go to the desired folder where the files are present.
5)now type a command
copy /b picname.jpg + filename.rar newpic.jpg
after this you get a msg files copied
6)you can now delete the file and file.rar and pic.
7)a new pic consists of the files you want to hide to get those right click on pic and click option open with winrar
is'nt it interesting.:)
1)make a folder and place a pic and the file you want to hide.
2)now make the file a new rar file of the same name by right clicking file and then the option add to archive(for this you first need to install winrar).
3)open command .(start->run->cmd)
4)now go to the desired folder where the files are present.
5)now type a command
copy /b picname.jpg + filename.rar newpic.jpg
after this you get a msg files copied
6)you can now delete the file and file.rar and pic.
7)a new pic consists of the files you want to hide to get those right click on pic and click option open with winrar
is'nt it interesting.:)
Subscribe to:
Posts (Atom)